AWS Lambda (NodeJS)
Introduction
This tutorial shows how to easily integrate our NodeJS SDK with AWS Lambda. We're going to cover two ways of doing it:\n Develop and deploy a Lambda App with multiple functions.\n Develop and deploy a Lambda NodeJS Express API.\n\nTo make everything easier, we're going to use Serverless Framework.
Lambda is a compute service that lets you run code without provisioning or managing servers. More information.
It's an all-in-one development solution for auto-scaling apps on AWS Lambda. More information.
Prerequisites
- Create a Moralis account
- Install and set up your editor of choice (we will use Visual Studio Code in this tutorial)
- Install NodeJS
- Install AWS CLI
- Install Serverless Framework
AWS setup
Create an AWS Account
To create an AWS account, simply follow the following guide here.
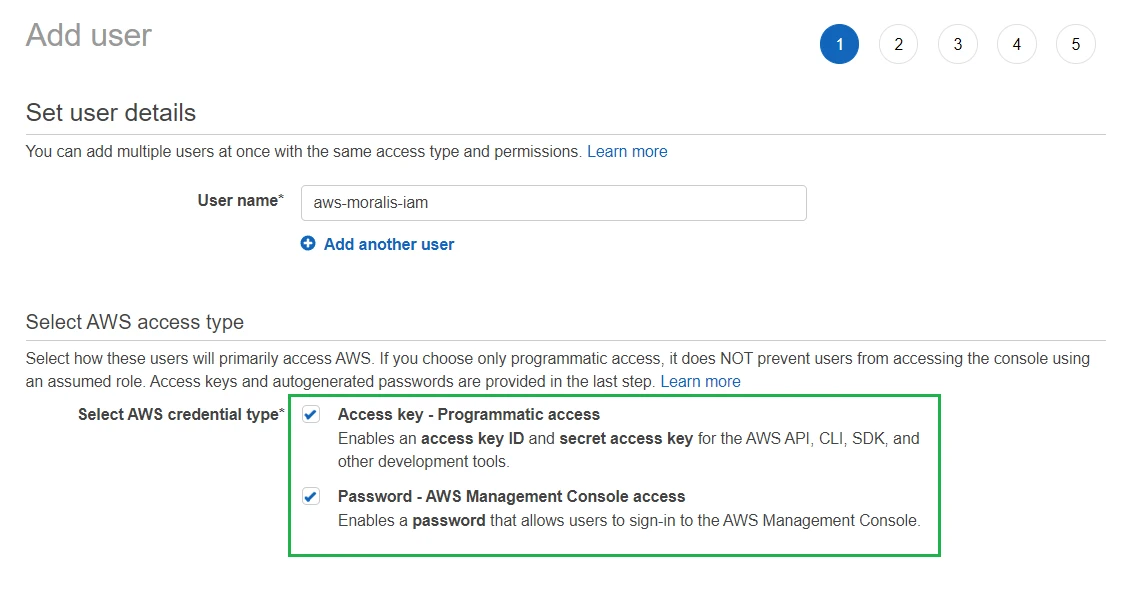
Create an IAM user
When creating the user, make sure you select both AWS Credential types:
Also make sure to attach AdministratorAccess as a policy:
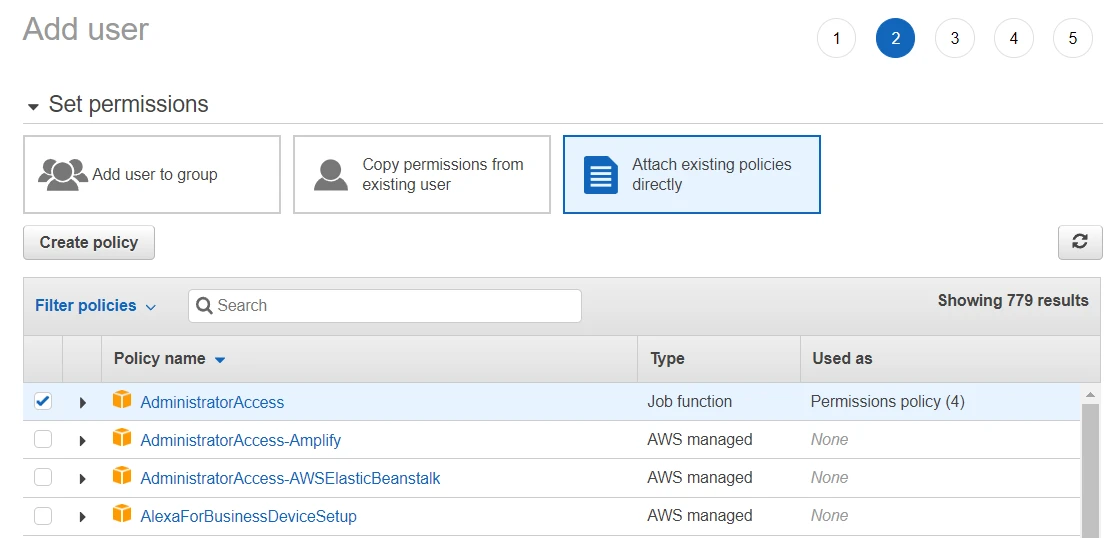
Be aware that the AdministratorAccess policy will give the IAM user a lot of control over your AWS environment. In a production environment, make sure to give the IAM users only the policies they require.
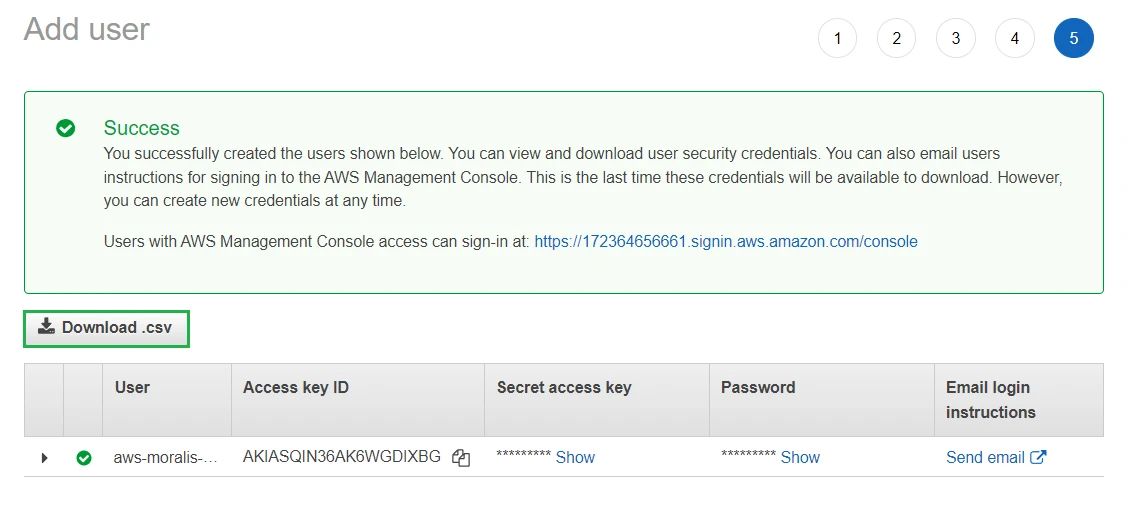
And last, but very important, download the credentials in a .csv:
Configure AWS Credentials
This is the first step we need to take. The project doesn't need to be set up yet as the credentials will be stored in your system. Thanks to having AWS CLI installed, you can open your terminal and run in any location:
aws configure
You'll need to enter your IAM User credentials (AWS Access Key ID and AWS Secret Access Key). Then press two times enter:
AWS Access Key ID [None]: AKIAIOSFODNN7EXAMPLE
AWS Secret Access Key [None]: wJalrXUtnFEMI/K7MDENG/bPxRfiCYEXAMPLEKEY
Default region name [None]: ENTER
Default output format [None]: ENTER
AWS credentials are configured!
Lambda App with multiple functions
You can download the completed VS Code project here. If you do so, you can skip Project setup and Development steps and go straight to Install dependencies.
Project setup
Create an empty folder and open it with VS Code. Then, open the terminal there and run:
serverless
Running this command should give you some options. Choose Starter:
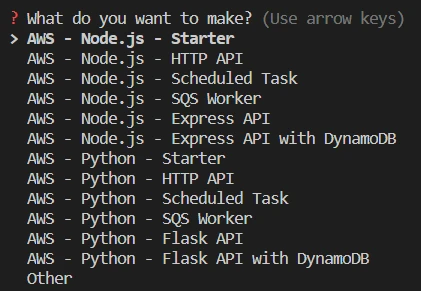
Press ENTER to choose a default project name or enter your own:

After Serverless has downloaded the template, it will ask you to login/register to the dashboard. We don't need it for this project so type n:

Finally, type n again as we don't want to deploy now:
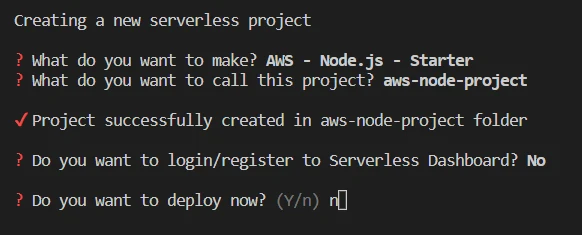
Type n again if the console seems stuck.
Nice! We have the sample project created:
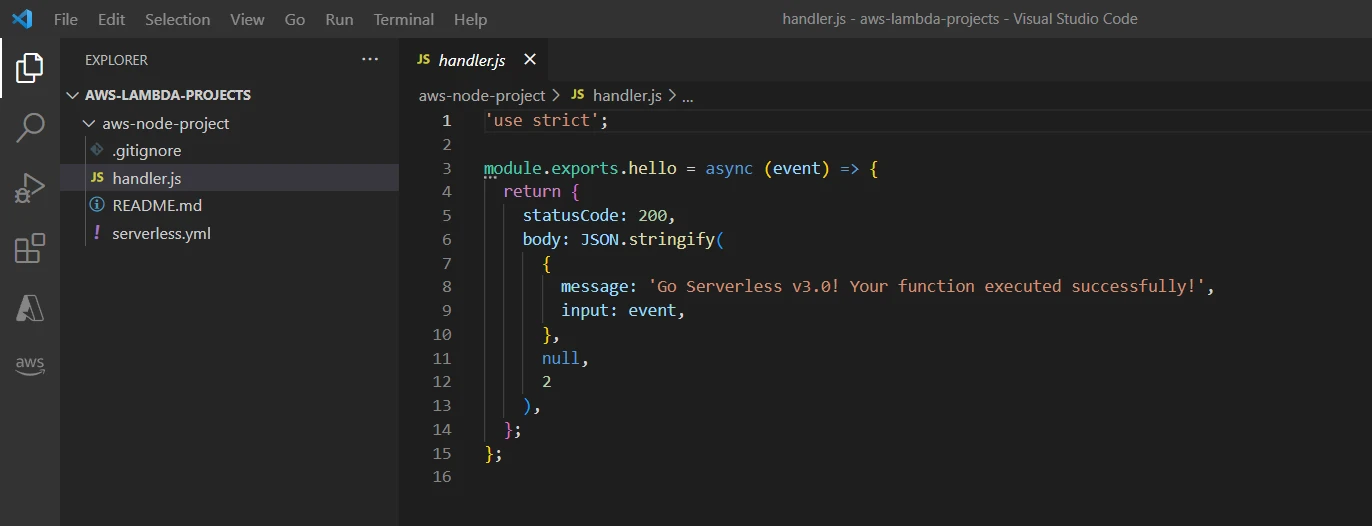
Now, let's create a new folder inside the project named functions as we will be creating multiple functions and placing them there:
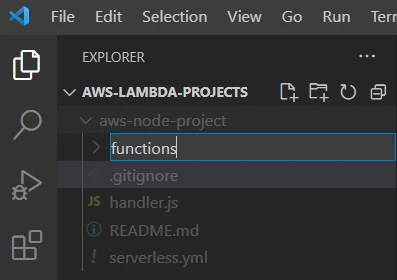
Continue by placing the auto generated handler.js inside:
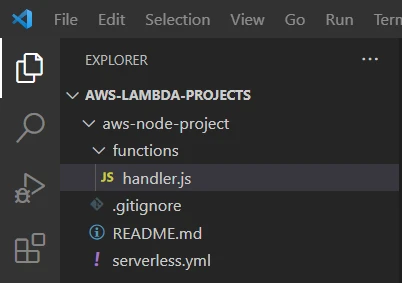
Now we have to open serverless.yml and set the new location of handler.js:
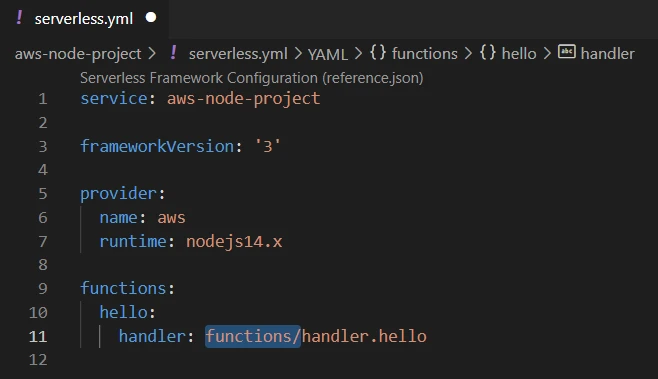
We also want to add the MORALIS_API_KEY as an environment variable. Replace the code in serverless.yml with the following:
service: aws-node-project

frameworkVersion: '3'

provider:
  name: aws
  runtime: nodejs14.x
  environment:
    MORALIS_API_KEY: 'replace_me'

functions:
  hello:
    handler: functions/handler.hello
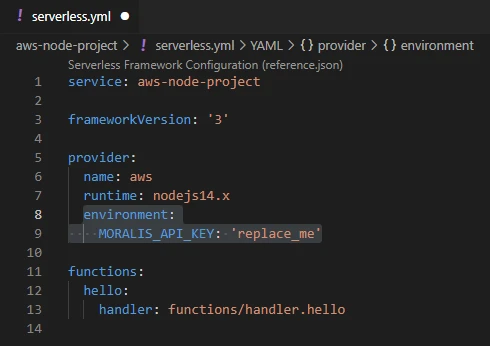
With that, we have the project set up.
Replace the MORALIS_API_KEY field with your own key before testing and deploying.
Development
Create getNativeBalance function
To start, let's use the existing handler.js. Rename it to getNativeBalance.js:
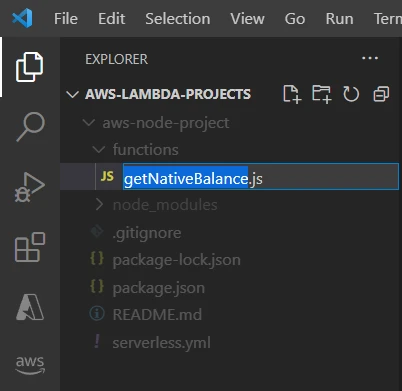
Also change module.exports.hello to module.exports.handler:
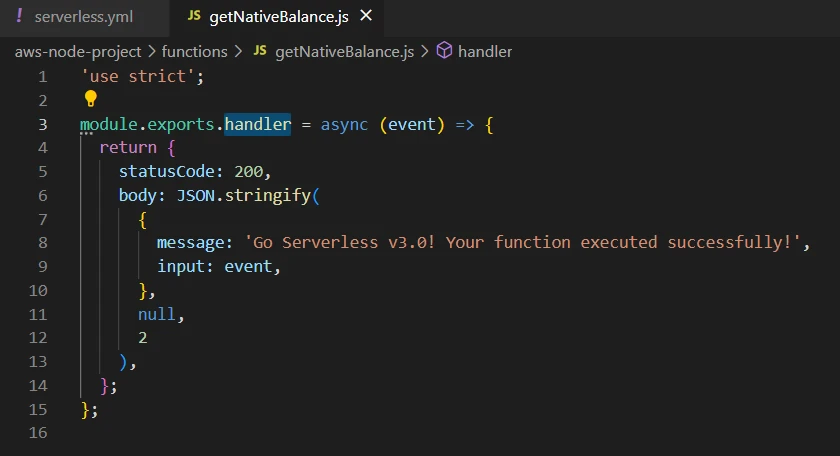
Now open serverless.yml and change the function name and handler:
service: aws-node-project

frameworkVersion: '3'

provider:
  name: aws
  runtime: nodejs14.x
  environment:
    MORALIS_API_KEY: 'replace_me'

functions:
  getNativeBalance:
    handler: functions/getNativeBalance.handler
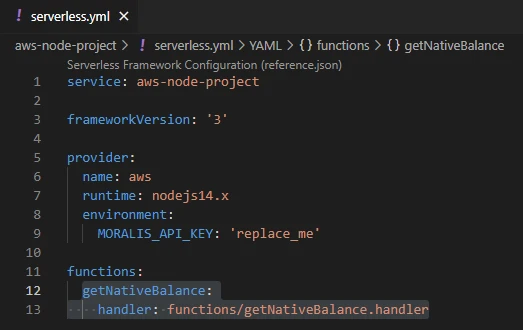
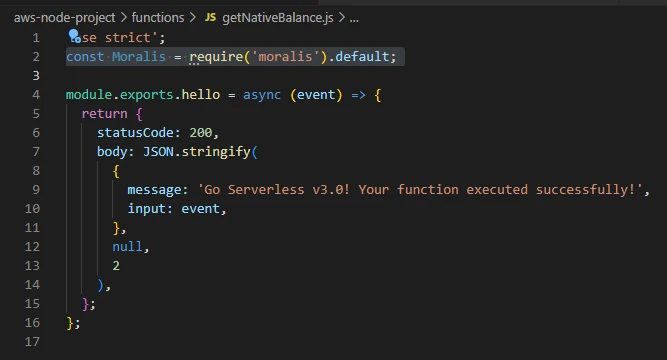
Finally it's time to customize the code in getNativeBalance.js and add the getNativeBalance Moralis functionality. Let's start by adding the Moralis requirement:
const Moralis = require("moralis").default;
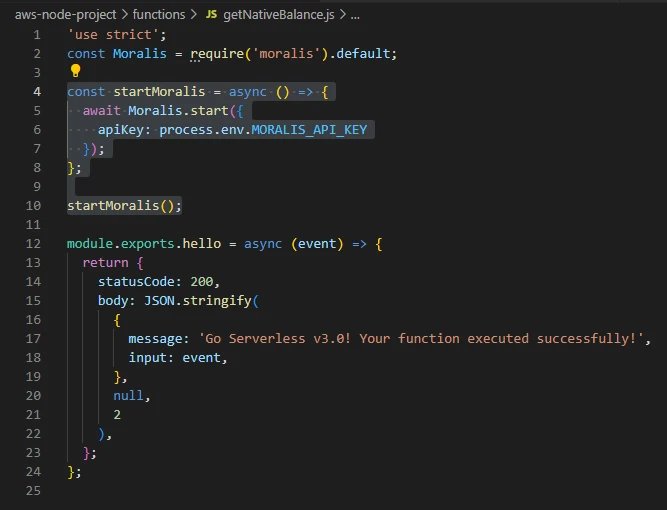
Add the function that will initialize moralis, using the MORALIS_API_KEY that we added as an environmental variable:
const startMoralis = async () => {
  await Moralis.start({
    apiKey: process.env.MORALIS_API_KEY,
  });
};

startMoralis();
Now swap all module.exports.handler code section for the following code, which implements the desired SDK method:
module.exports.handler = async (event) => {
  // Get native balance
  const nativeBalance = await Moralis.EvmApi.balance.getNativeBalance({
    address: event.address,
    chain: event.chain,
  });

  // Format the native balance formatted in ether via the .ether getter
  const nativeBalanceEther = nativeBalance.result.balance.ether;

  return {
    result: nativeBalanceEther,
  };
};
We pass the address and the chain as event parameters.
The complete getNativeBalance.js should look like this:
"use strict";
const Moralis = require("moralis").default;

const startMoralis = async () => {
  await Moralis.start({
    apiKey: process.env.MORALIS_API_KEY,
  });
};

startMoralis();

module.exports.handler = async (event) => {
  // Get native balance
  const nativeBalance = await Moralis.EvmApi.balance.getNativeBalance({
    address: event.address,
    chain: event.chain,
  });

  // Format the native balance formatted in ether via the .ether getter
  const nativeBalanceEther = nativeBalance.result.balance.ether;

  return {
    result: nativeBalanceEther,
  };
};
Create getWalletNfts function
Create a new file under functions folder and name it getWalletNfts.js:
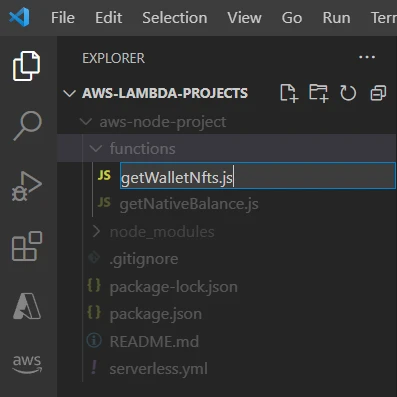
Go to serverless.yml and add the following code in functions:
getWalletNfts:
    handler: functions/getWalletNfts.handler
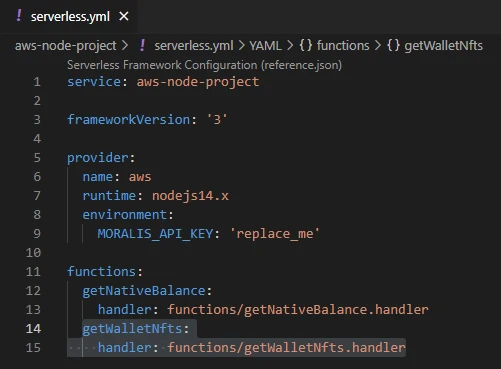
Finally, complete getWalletNfts.js by adding the following code:
"use strict";
const Moralis = require("moralis").default;

const startMoralis = async () => {
  await Moralis.start({
    apiKey: process.env.MORALIS_API_KEY,
  });
};

startMoralis();

module.exports.handler = async (event) => {
  // Get wallet NFTs
  const nfts = await Moralis.EvmApi.nft.getWalletNFTs({
    address: event.address,
    chain: event.chain,
    limit: 10,
  });

  return {
    result: JSON.stringify(nfts),
  };
};
Install dependencies
IMPORTANT: On the terminal, place yourself at the root folder of the project. I named my project aws-node-project so in my case I need to run:
cd aws-node-project

Now that we're in the right location, let's install moralis:
npm install moralis
Local testing
Open event.json in the project root folder:
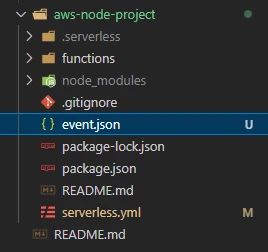
Replace the address and chain values with your own information:
Now let's test one of the functions, for example getNativeBalance. Open the terminal and run:
serverless invoke local -f getNativeBalance --path event.json
Test run successfully!

Lambda NodeJS Express API
You can download the completed VS Code project here. If you do so, you can skip Project setup and Development steps and go straight to Install dependencies.
To continue, it's recommended (but not mandatory) that you complete Your First Dapp - Using NodeJS first, as we'll be using a similar approach and code. However, in this case we use serverless to create and deploy the Express app, as it's AWS Lambda-ready.
Project setup
Create an empty folder and open it with VS Code. Then, open the terminal there and run:
serverless
Running this command should give you some options. Choose Express API:
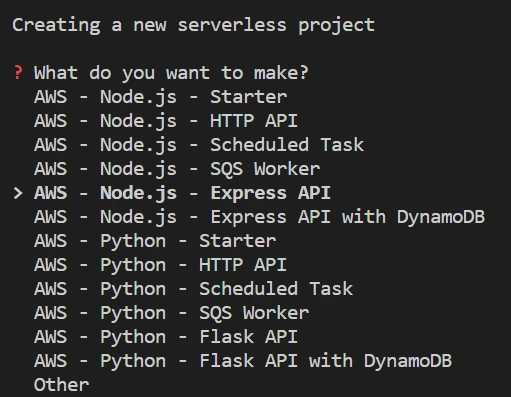
Press ENTER to choose a default project name or enter your own:

After Serverless has downloaded the template, it will ask you to login/register to the dashboard. We don't need it for this project so type n:

Finally, type n again as we don't want to deploy now:
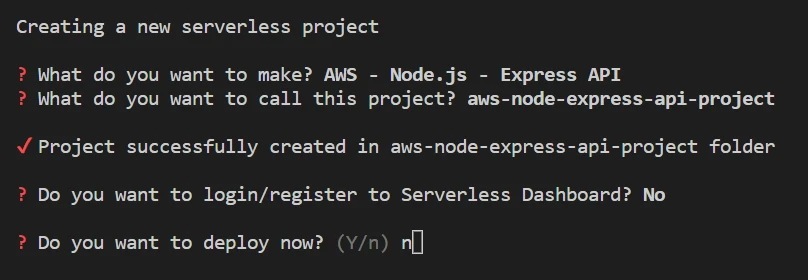
Type n again if the console seems stuck.
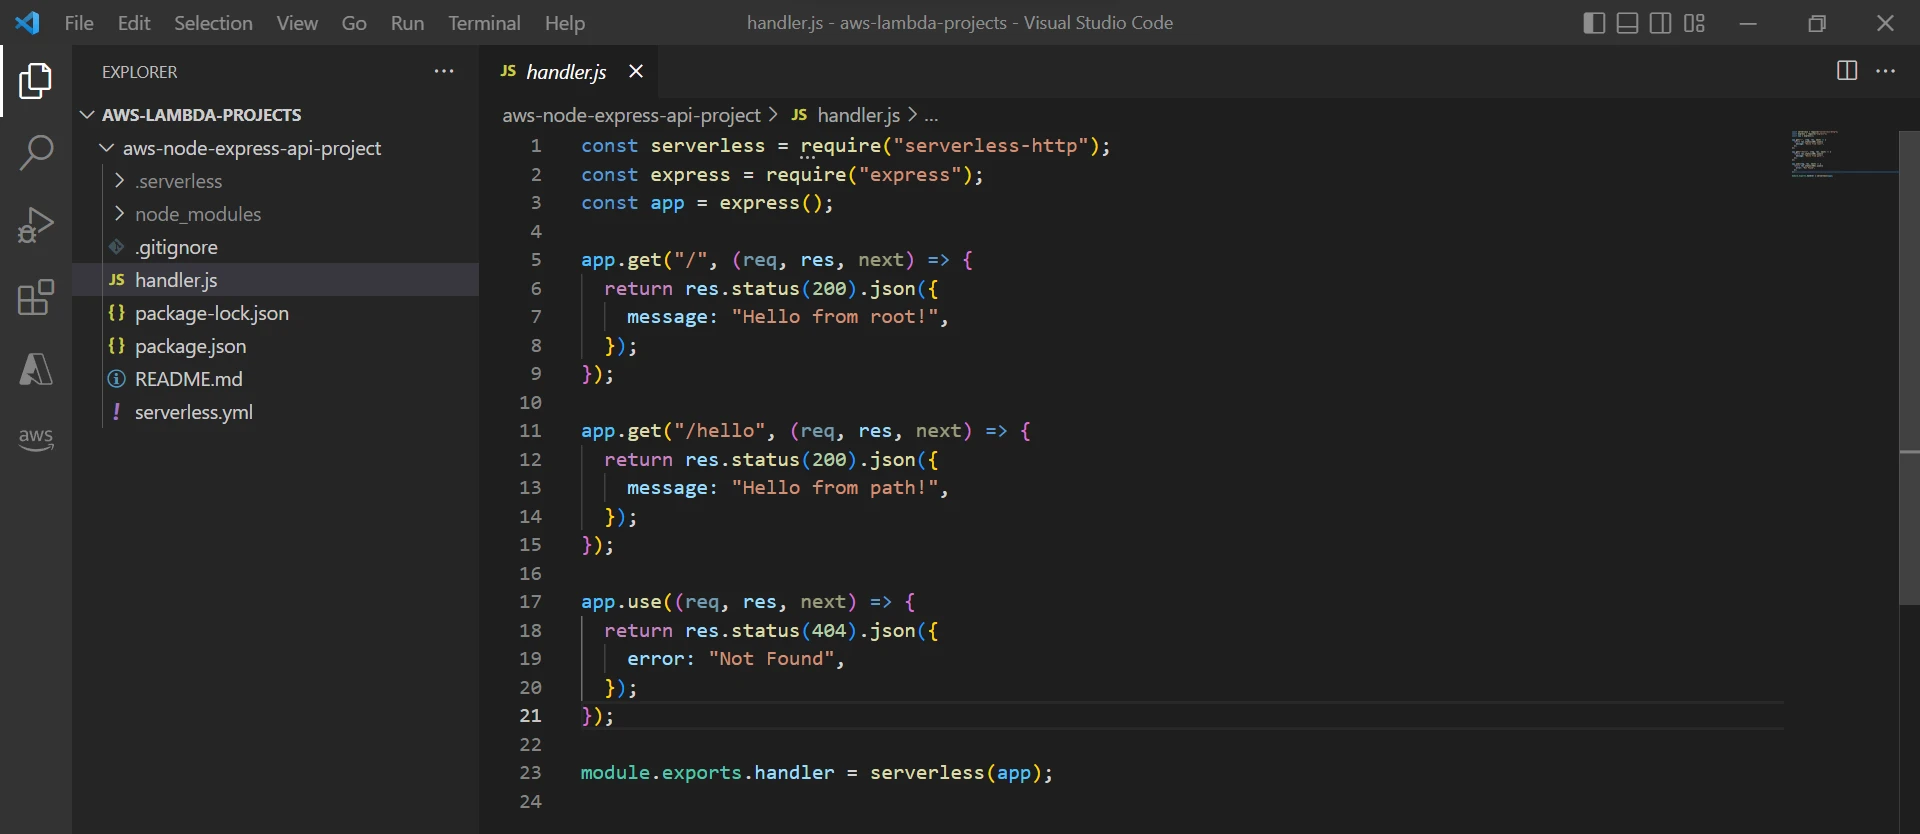
Now the sample project is created:
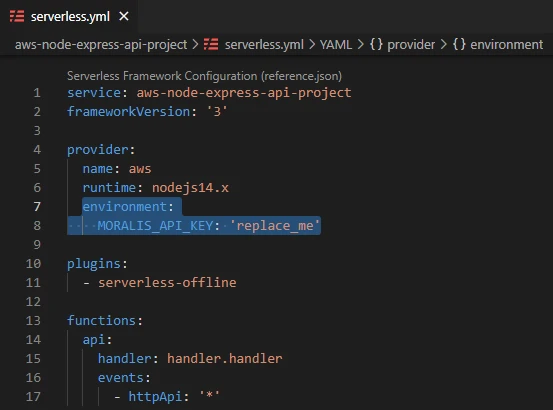
We also want to add the MORALIS_API_KEY as an environment variable. Replace the whole code in serverless.yml with the following:
service: aws-node-express-api-project
frameworkVersion: '3'

provider:
  name: aws
  runtime: nodejs14.x
  environment:
    MORALIS_API_KEY: 'replace_me'

plugins:
  - serverless-offline

functions:
  api:
    handler: handler.handler
    events:
      - httpApi: '*'
With that, we have the project set up.
Replace the MORALIS_API_KEY field with your own key before testing and deploying.
Development
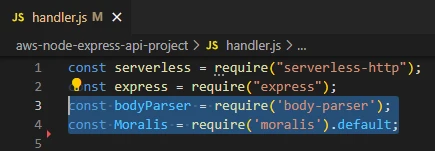
Let's start by adding the packages needed in this app, which are moralis and body-parser. To do so, open handler.js and add the following:
const bodyParser = require("body-parser");
const Moralis = require("moralis").default;
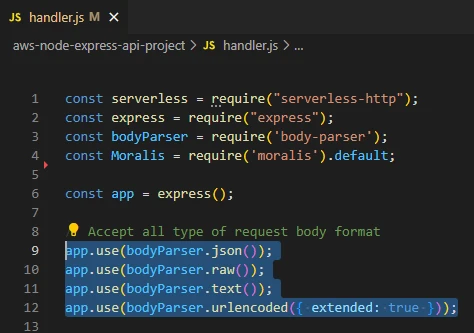
Add the following to allow the app accept all types of request body formats:
app.use(bodyParser.json());
app.use(bodyParser.raw());
app.use(bodyParser.text());
app.use(bodyParser.urlencoded({ extended: true }));
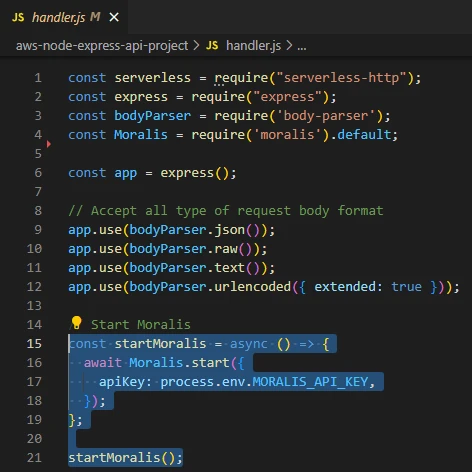
Finally let's add the function that will initialize moralis, using the MORALIS_API_KEY that we added in the environment:
const startMoralis = async () => {
  await Moralis.start({
    apiKey: process.env.MORALIS_API_KEY,
  });
};

startMoralis();
Create getNativeBalance endpoint
With moralis initialized, we can start adding our preferred functionalities. To do so, let's create a new Express endpoint and add a Moralis SDK function inside. Let's add the getNativeBalance function, which will call the getNativeBalance API endpoint when the Express endpoint is called:
app.get("/getNativeBalance", async (req, res, next) => {
  try {
    // Get native balance
    const nativeBalance = await Moralis.EvmApi.balance.getNativeBalance({
      address: req.body.address,
      chain: req.body.chain,
    });

    // Format the native balance formatted in ether via the .ether getter
    const nativeBalanceEther = nativeBalance.result.balance.ether;

    res.status(200);
    res.send(nativeBalanceEther);
  } catch (error) {
    // Handle errors
    console.error(error);
    res.status(500);
    res.json({ error: error.message });
  }
});
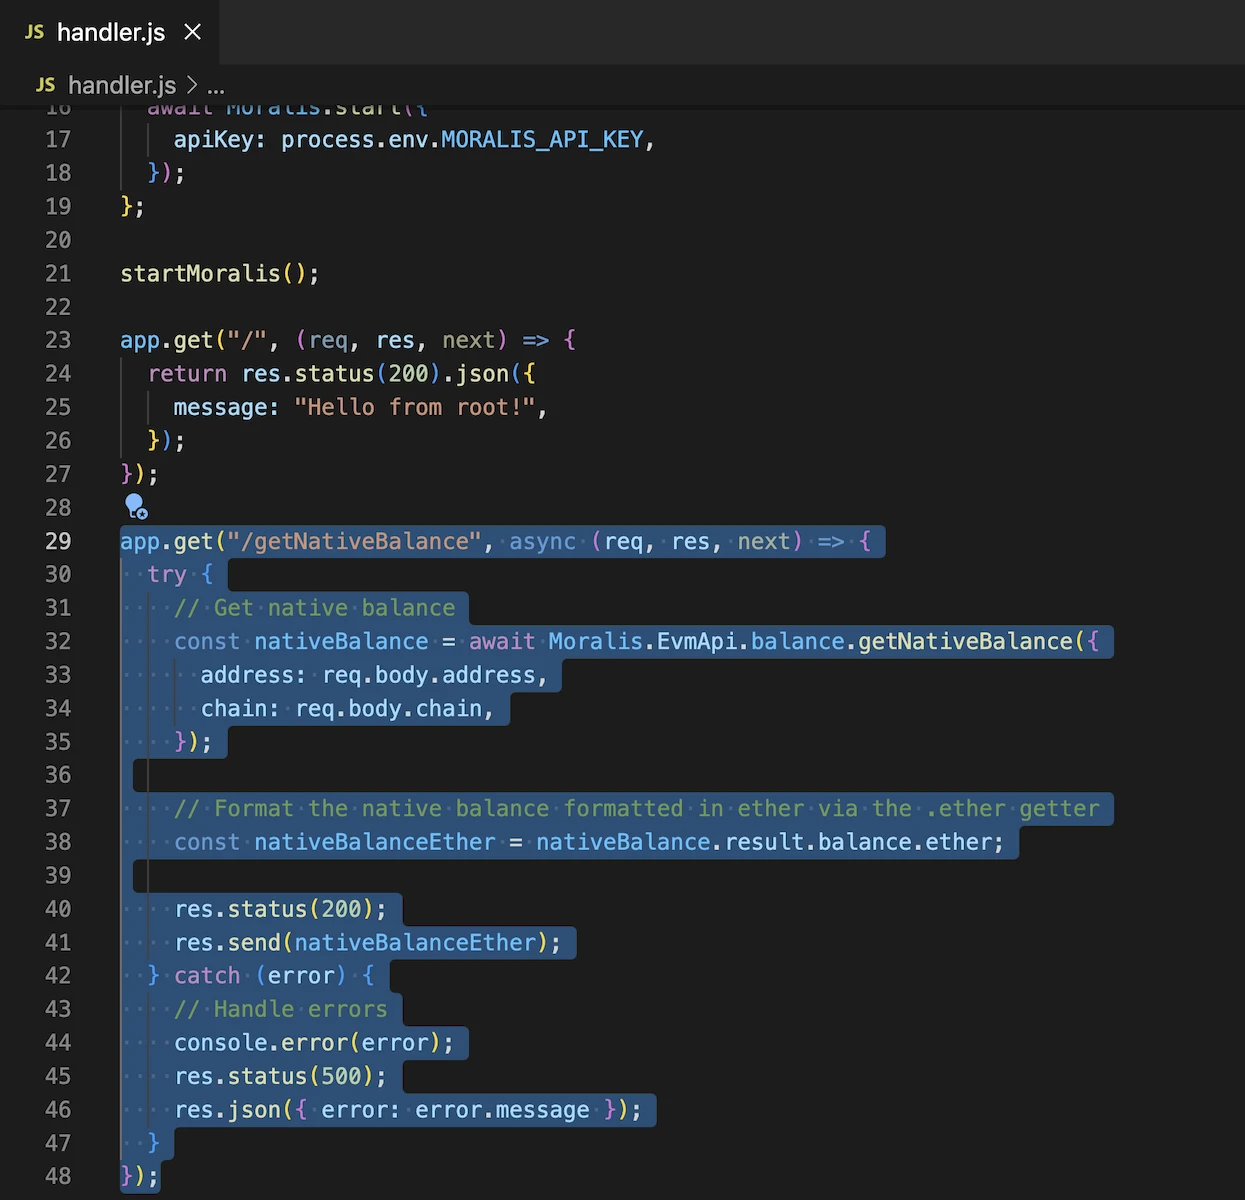
We pass the address and the chain as parameters in the request body.
Create getWalletNfts endpoint
Let's create a new Express endpoint and add another Moralis SDK function inside. Let's add the getWalletNfts function, which will call the getWalletNfts API endpoint when the Express endpoint is called:
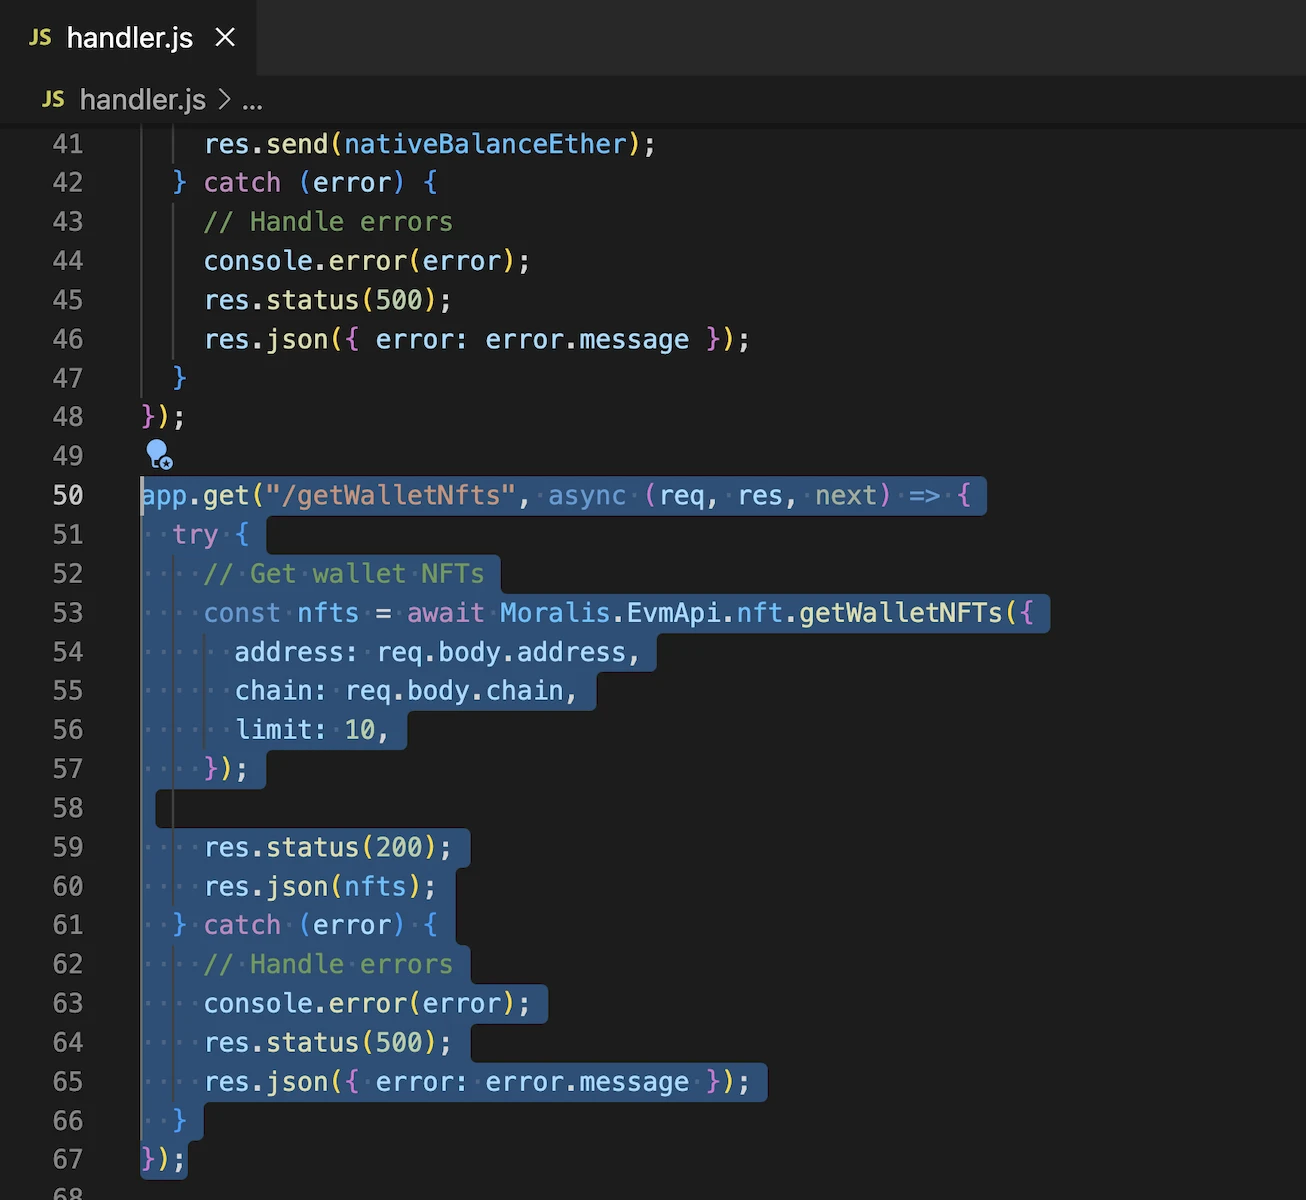
app.get("/getWalletNfts", async (req, res, next) => {
  try {
    // Get wallet NFTs
    const nfts = await Moralis.EvmApi.nft.getWalletNFTs({
      address: req.body.address,
      chain: req.body.chain,
      limit: 10,
    });

    res.status(200);
    res.json(nfts);
  } catch (error) {
    // Handle errors
    console.error(error);
    res.status(500);
    res.json({ error: error.message });
  }
});
We pass the address and the chain as parameters in the request body.
Final code
This is how handler.js should be adding the endpoints. You could repeat the same process above to add other Moralis SDK functionalities:
const serverless = require("serverless-http");
const express = require("express");
const bodyParser = require("body-parser");
const Moralis = require("moralis").default;

const app = express();

// Accept all type of request body format
app.use(bodyParser.json());
app.use(bodyParser.raw());
app.use(bodyParser.text());
app.use(bodyParser.urlencoded({ extended: true }));

// Start Moralis
const startMoralis = async () => {
  await Moralis.start({
    apiKey: process.env.MORALIS_API_KEY,
  });
};

startMoralis();

app.get("/", (req, res, next) => {
  return res.status(200).json({
    message: "Hello from root!",
  });
});

app.get("/getNativeBalance", async (req, res, next) => {
  try {
    // Get native balance
    const nativeBalance = await Moralis.EvmApi.balance.getNativeBalance({
      address: req.body.address,
      chain: req.body.chain,
    });

    // Format the native balance formatted in ether via the .ether getter
    const nativeBalanceEther = nativeBalance.result.balance.ether;

    res.status(200);
    res.send(nativeBalanceEther);
  } catch (error) {
    // Handle errors
    console.error(error);
    res.status(500);
    res.json({ error: error.message });
  }
});

app.get("/getWalletNfts", async (req, res, next) => {
  try {
    // Get wallet NFTs
    const nfts = await Moralis.EvmApi.nft.getWalletNFTs({
      address: req.body.address,
      chain: req.body.chain,
      limit: 10,
    });

    res.status(200);
    res.json(nfts);
  } catch (error) {
    // Handle errors
    console.error(error);
    res.status(500);
    res.json({ error: error.message });
  }
});

module.exports.handler = serverless(app);
Install dependencies
IMPORTANT: On the terminal, place yourself at the root folder of the project. I named my project aws-node-express-api-project so in my case I need to run:
cd aws-node-express-api-project

Now that we're in the right location, let's install moralis and body-parser:
npm install moralis body-parser
Local testing
Before deploying to AWS, it's always good to test things locally. We can do so by using the serverless-offline plugin. This plugin helps to emulate the API Gateway environment for local development.
Install the plugin:
npm install --save-dev serverless-offline
Then add the plugin to serverless.yml:
plugins:
  - serverless-offline
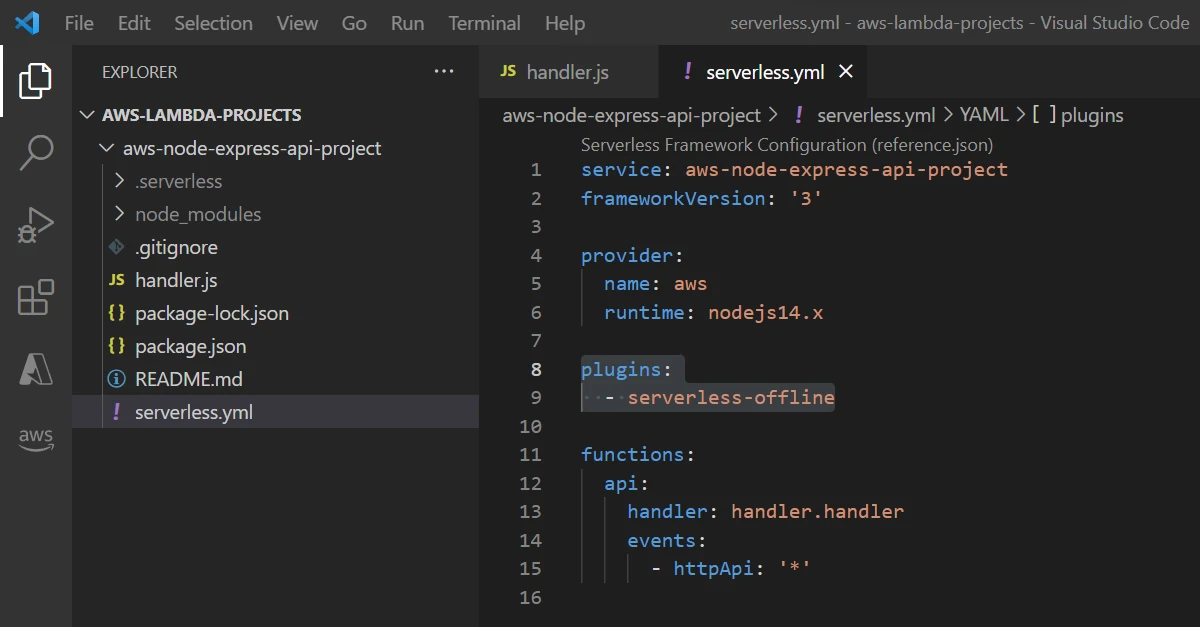
Then, start the serverless-offline server:
serverless offline start
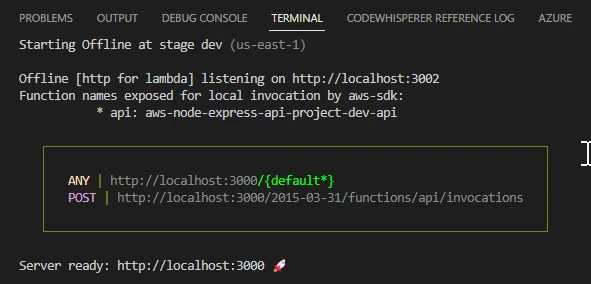
To test, navigate to http://localhost:3000 in your browser:
Very nice! And the best thing is that if you make a change in handler.js file, it will be automatically applied and you'll see the result the next time you hit the endpoint. This rapidly improves development time.
To test an endpoint that requires a request body, you can use Postman or any other API platform out there.
Deployment
If you come from GitHub completed projects, make sure you have the dependencies installed before deploying:
It's time to deploy to AWS. Whatever project you chose, open the terminal and make sure you're in the root folder (where you installed the dependencies). Then, run this simple command:
serverless deploy

Congratulations! Your app is running on AWS Lambda :)
:::
AWS Lambda Console
If you have followed the whole tutorial and deployed both the Lambda App with multiple functions and the Lambda NodeJS Express API, your AWS Lambda Functions page should look like this:

The deployment of the Lambda App with multiple functions created two single functions:

By contrast, the Lambda NodeJS Express API is contained in just one function:

Next, we differentiate the testing process between these functions:
Testing Express API function
Open the Functions page and choose aws-node-express-api-project-dev-api.
Select API Gateway:
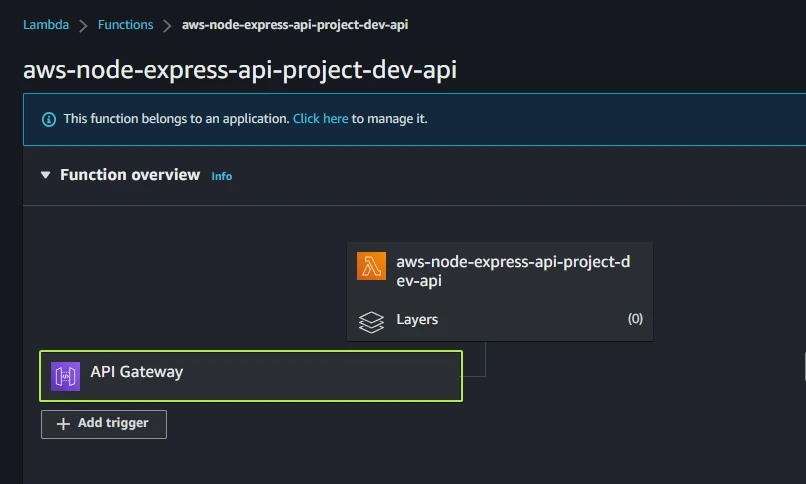
Here you will find the API endpoint URL. Click on it:
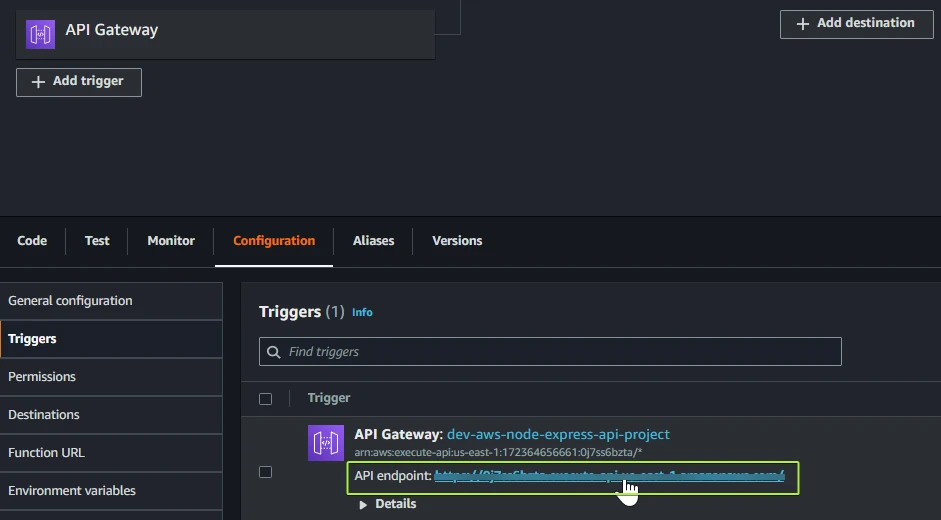

You could reach getNativeBalance and getWalletNfts endpoints by adding them at the end of the URL:
These GET requests need a body with address and chain parameters, you can to use an API platform like Postman to test it.
Testing single functions
Open the Functions page and choose aws-node-project-dev-getNativeBalance or aws-node-project-dev-getWalletNfts.
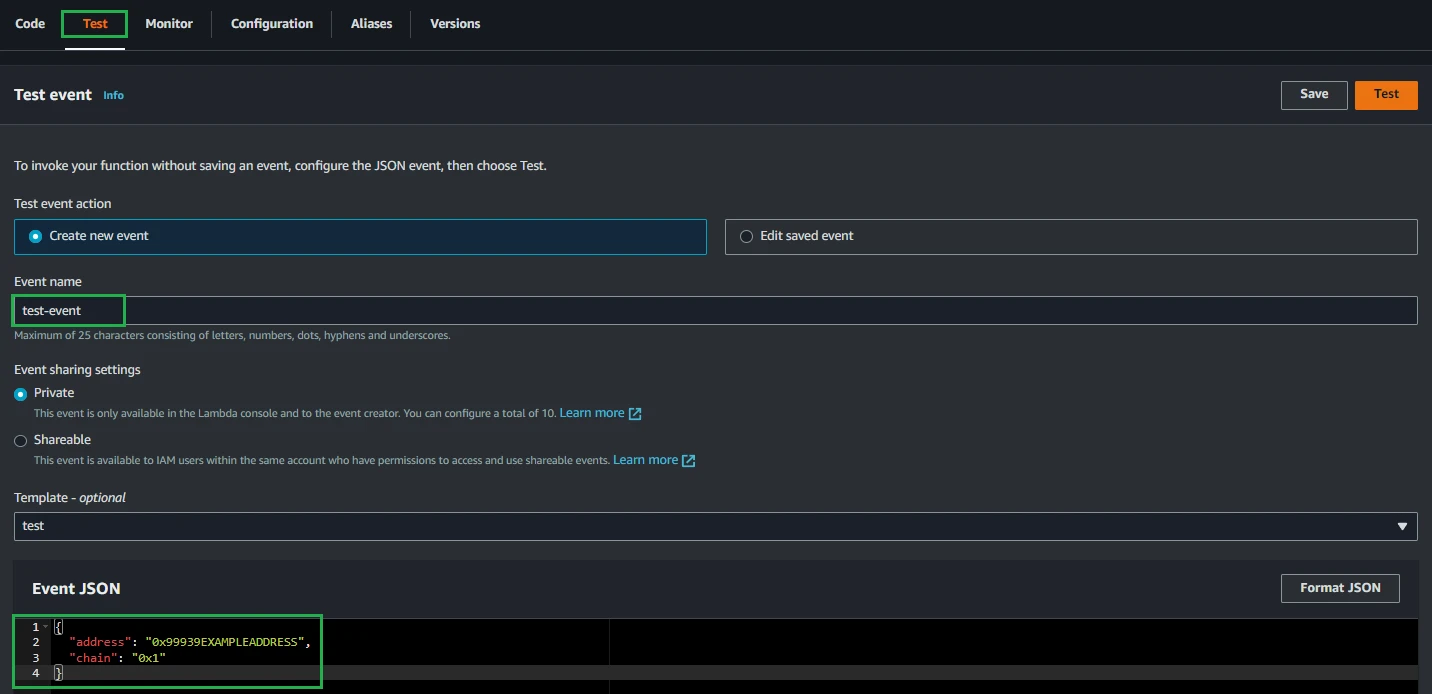
You can test your function by pressing the Test tab. Set an Event name and make sure to add your wallet address and chain as event parameters in the Event JSON section:
{
  "address": "0x99939EXAMPLEADDRESS",
  "chain": "0x1"
}
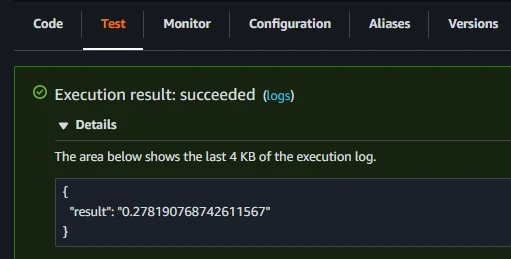
Then choose Test and see the result:
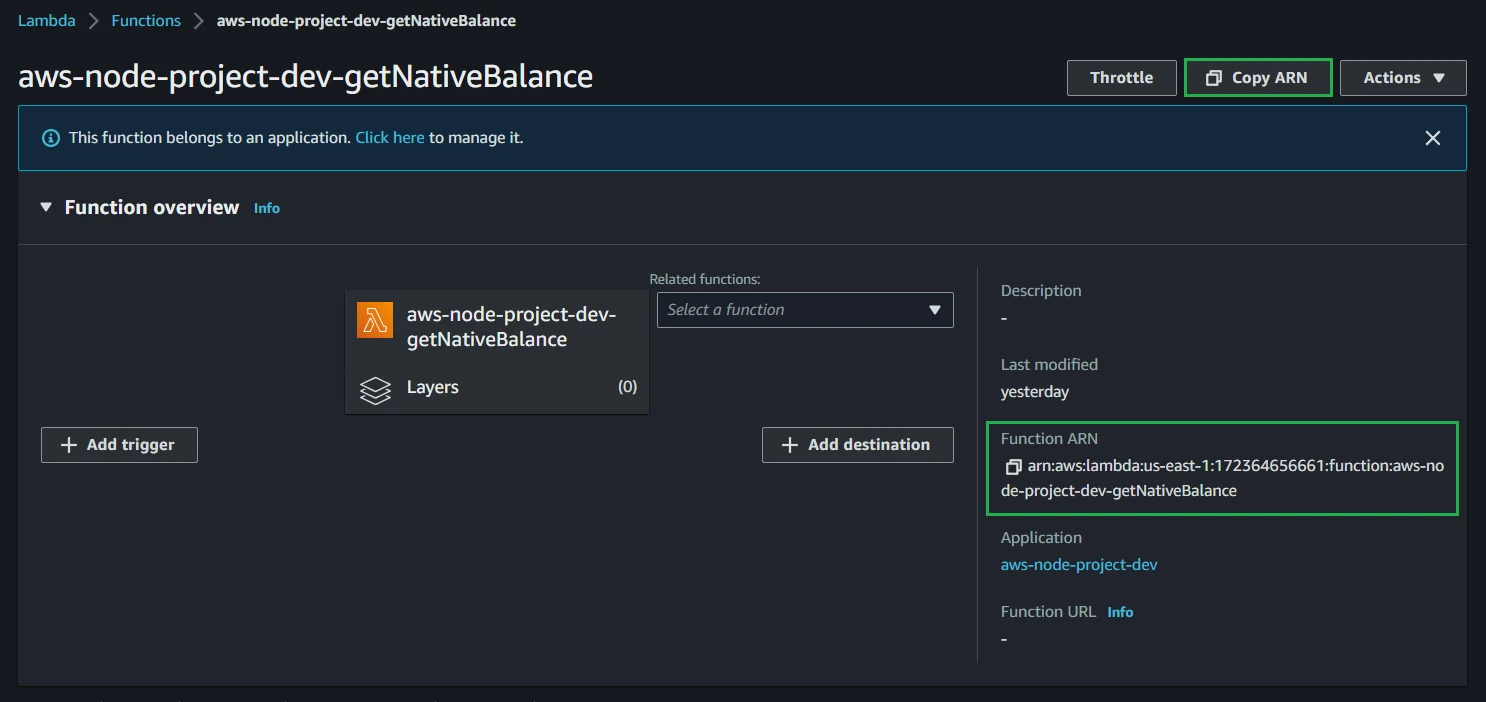
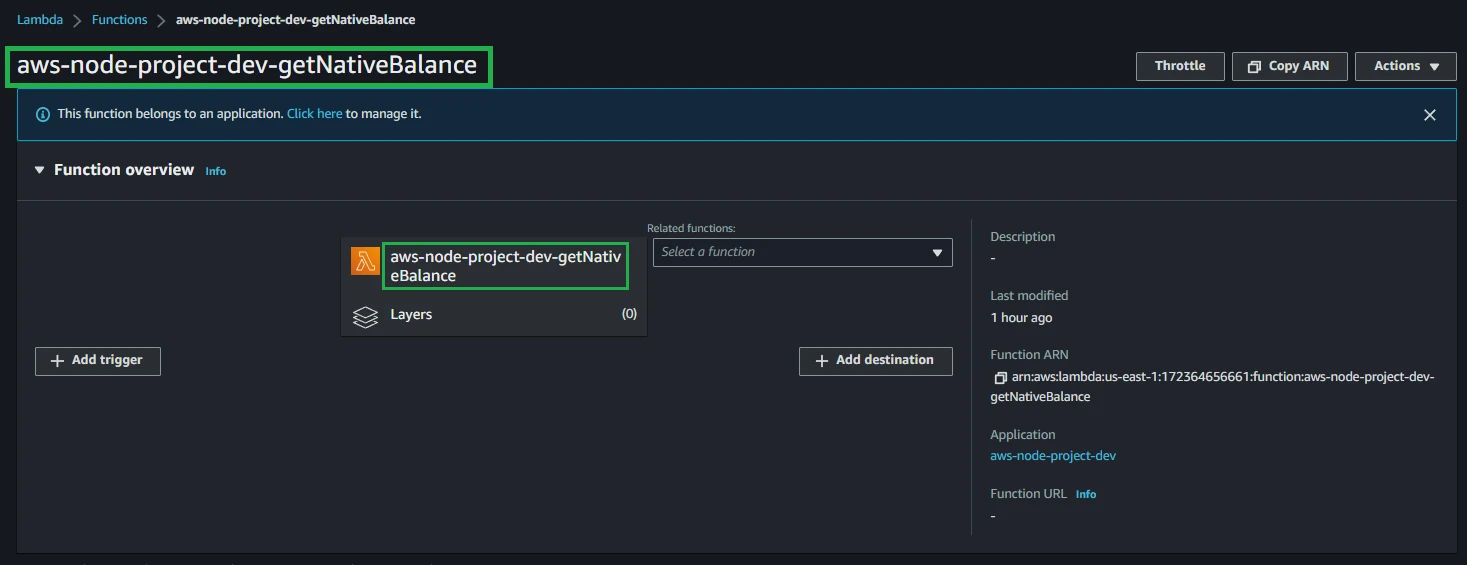
Find function name
Open the Functions page and choose any function.
Marked with green is where you can find the function name:
Copy function ARN
Open the Functions page and choose any function.
Marked with green is where you can copy the ARN which is the identifier of the function in all AWS:
